|
While rules are made to be broken and you should never say never, starting therethe middle--on the road to mastery of landscape photography would be like taking a trip with no beginning. If you dont have a start, how do you know when youre done? Total control over the basics is the first book of the novel Landscape Photography. Dont worry if you dont know where to start. Take some pointers from the masters to get the ball rolling.
These tips were collected from practical experience in the field and recommendations from other photographers. Im not the first to promote them. Everyone thats spent any time in the field shooting the landscape has tried one or another to improve their image. You dont have to be a beginner to use them. I routinely use these tips to make sure Ive got the basics handled before attempting anything really unique. Try them on for size and see how they work for yourself. Once youve got a handle on these, break the rules to expand your vision.
(1) Remove What You Dont Need Photographers are like sculptures. They ply their trade by removing the extraneous elements to get to the heart of the matter. Painters on the other hand are just the opposite. They start with blank canvas and add elements to make their images work. Discover what attracts you to a scene and determine the heart of the matter. Figure out how to emphasize that specific element then minimize the rest. Keeping what you dont need diverts attention from your message at best and kills the image at worse.
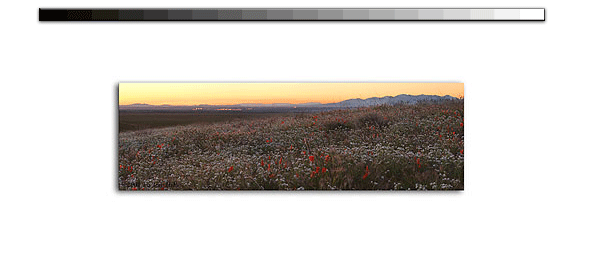
(2) Dynamic Light Some photographers say all were doing when tripping the shutter is capturing light--bad light, bad images. Great light; youre on the right road. What does all this mean? Try shooting during the magic hourthe hour before and after sunrise and sunsetto add punch to your images. Be careful how you expose your images because the sun is low to the horizon during this time and can easily fool reflective meters like those in most modern SLRs and inadvertently close things down. Adding a third or two stops of compensation might be needed to keep things bright.
(3) Control What The Viewer Sees Leading lines from the fore to back keeps the viewer focused. Adding elements in the foreground that relate to the background keeps the viewer from wandering around the image and losing interest. Do what you can to keep things simple and obvious for the main point of your image. Place a path in your image like a set of bread crumbs that anyone can follow to see what you see. Delete things that guide you off the image. Lines coming out of the frame tend to lead people away and detract from your message.
(4) Emphasize Sharpness Do what you need to keep those images sharp. That means avoiding the blurries by expanding the DOF with a small aperture. Use the DOF reference on your lens. Use one stop less than your aperture to make sure everything is in focus. If your camera has a DOF preview, use it to triple check whats in focus and whats not. Small apertures mean long exposuresthe bane of photographers. When shooting these exposures, use a super steady tripod and avoid 1/10 to 1/25sec. Use a remote release or shutter timer to minimize shaking your camera when activating the shutter. Dont use your lens smallest aperture. Eventually optical physics catches up when using smaller and smaller apertures. Getting too small can cause your images to get more blurry instead of sharpening up.
(5) Control the Dynamic Range The human eye and brain see so much more than film or CCD. Understanding your equipments limits is the first step towards successfully creating a vision. The light rangedark to brightyou see is significantly more than any film or digital camera. Knowing when this is a problem then taking the appropriate action is the key. Filters--like Neutral Density filters--can be used to keep things in range. Using an ND filter when shooting a sunrise, can hold back the bright sky while allowing the foreground to be properly exposed. Applying contrast masks in your digital darkroom is similar to using filters in the field. Knowing that blown highlights can never be recovered while dark shadows are generally more correctable. This means underexpose when given a choice because its easier to fix things later.
|
|
|


