|
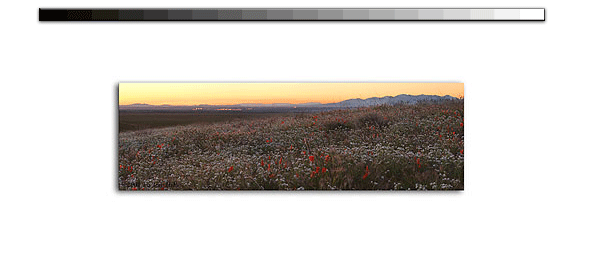
One of the coolest things in photography is how rich it is that you can use as many different canvas sizes as you wish. Contrary to what the major brand film and camera have you, there's life beyond a standard 1x1.5 aspect ratio. That means there's more to image proportions then what comes out of the camera. You don't have to be restricted to 4x6 inch images. You can explore square or even landscape/panomramic formats. The point of this article is constructing panoramics using the same camera equipment that's previously been restricting with their "out of the box" formats. Of course, going down this road--using your equipment beyond its makers intentions--might cause you to be labled as a "free-thinker", "non-conformist", "trouble-maker"... Take comfort in you're stretching the envelop and expanding the human perspective by taking this road. Though initially painfull, it's richly rewarding. Anyway, on with the tutorial.
First, let's assume you've got a basic understanding of Photoshop (PS). I'm using Photoshop 7.0 for this article. Conceptually, it applies to any PS version. The first step involves making your pictures in camera in the field. The more work you do out in the field, the less you'll have to deal with in PS. Since we're going to stitch several images together to make one complete panoramic, exposure and color tones becomes a factor. Note: we're going to place the camera on its tripod, then revolve it around it's base while taking several overlapping pictures. I suggest locking in an exposure by using your camera's manual mode and exposing for most important part of the scene using any of your favorite metering techniques. I personally use my camera's hightech Matrix Metering. I do this based on lots of personal experience. If you're a auto-exposure cripple, this may be the only time I might convince you to switch it out of auto and into manual. The reason is you want each image to have the same tonality as the next--as if each were part of a single larger image. You want every image of your panorama to let the same light in as if they were taken at the same time using a very large panoramic camera. In my case, I have an additional worry. My digital camera uses a advanced auto white balance function. When left in automatic, this white balance function carefully tailor's each image to make it look right colorwise. Unfortunately, like exposures subtle changes in scene characteristics can have dramatic affect on a pictures actual white balance. Therefore, I like to use my camera's manual white balance functions to remove another variable in my image's tones.
Once that's done, now consider how you're going to pan your camera from shot to shot. I use the caveman/dirt-farmer approach by simply leveling the tripod and then squaring the camera to the horizon. That's simplier said then done. Leveling a tripod without special equipment can be trying at times. Also, squaring a camera with its wide-angle lens can be a total waste of time. Remember, only the best wide-angle lenses minimize barrel distortion which cause straight lines to remain straight off the lens' view-center. Still, don't get too worried. You can get by with the equipment already have. Real expensive, specialized equipment isn't needed
Once I've got the camera setup and exposure figured out, I "guestimate" how much I'm going to pan. The wider the lens field of view, the more you'll have to over-lap the images. I over-lap each of my images made with my 18-35mm lens about 66%. This gives me about 90 degs of view with only three images, a little more with four images.
Where are we now? We've locked in the exposure using manual everything, we've steady/squared the camera to the horizon, and we've considered how much the images will over-lap. Anything else? Yep, don't dilly dally around when shooting. During the magic hour where light is changing quickly, your image will change if you delay from the first to last image. So, don't waste any time fixing things in the middle of your shoot. Figure out what you want, then fire away and don't waste time. The beauty of digital photography is if something doesn't work out, just delete and no one knows except for you. The whole goal with all these techniques is will minimize the PS pain that's sure to come when you get back to your digital-darkroom.
|
|
|


