|
5) Organize your camera bag Or, put things back to where you found them. Theres nothing more frustrating than looking in your camera bag for the one tool thatll make the image special and then not finding it. The lesson here is finding places for your photography tools in your photo vest or camera bag then religiously avoid re-arranging your gear. When the going gets franticand you know it always doesyou want to be able to depend on finding your equipment the first time. You dont want to miss the shot because you were fishing for something where you thought it was. I spend a lot of time assessing and reassessing where my gear is stored. I do this a home in the comfort of my living room. One of the most important considerations is accessibility. I keep the most commonly used gear in the easiest, most accessible locations. Other stuff I use less often is less accessible. That doesnt mean just because I use those items so rarely gives me license to make them hard to find. It just means they arent in the prime real estate locations I reserve for the most important stuff. That said I try to avoid bringing equipment I know have little chance of being used. I found traveling light is much more important than carrying around a rarely used piece of kit that might one day be used. Even though I figure where everything goes at home, I routinely review what works and what doesnt when Im out in the field. When exercising my gear, I always, always, always, put the stuff back where I found it. At first, this is a difficult problem. After getting used to the situation, it becomes automatic. Youll eventually find yourself instinctively reaching for things when you need them. Its muscle memory at work that only gets taught when you put things in their place all the time. One final note, after removing or replacing things, close their covers and zip them up. So many times, youll be out in the field dealing with a situation when all of a sudden you have to jump up and rush to the next location. It might look kind of funny having your equipment fall out of their locations as you hoof it. A little extra work in the beginning will pay long dividends in the long run.
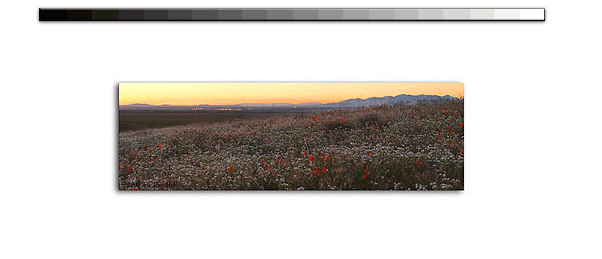
6) Expose for highlights, process for shadows Digital photography is inherently different than shooting chromes or negatives. One of the most important characteristics of digital photography is its flexibility. Where film and chrome mediums usually require close coordination with a lab to create printed final products, digital images can usually be processed quickly and accurately from the comfort of your own computer. As a rule, most people shooting film and digital adjust their cameras for the best exposure and hope the films dynamic range is wide enough to capture the images highlights and shadows. Most of the time, that works like a champ. However, when it goes wrong the image is lost forever. The most dangerous area is an images highlightsthe highly reflective, brightest part of the image. The important point here is while most problems with an image can be fixed using the tools in your computer using a powerful application such as Photoshop, nothing can be done if theres nothing for the application to work with. Highlights are especially sensitive to losing its detail. Once the detail is lost, youre done. Nothing can be done to reduce the damage. If you have an image with lots of especially hot highlights, youre in great danger of creating an unacceptable image if you dont follow a very old rule made famous by one of the most important photographers ever; expose for the highlights, process for the shadows. Ansel Adams did this all the time to control the dynamic rangethe brightness range from its most brilliant to darkest part--of a scene so all its elements are within the narrow constraints of film. Remember, film isnt nearly as flexible as a human eyedigital isnt any differentjust because you can see it, doesnt mean itll be recorded correctly when the trigger is pushed. The best suggestion to avoid problems is Ansels technique. If you keep the highlights under control, the darker areas can usually be fixed using post processing. So, when you have lots of hot highlights pull the exposure 1/3 to 2/3s of a stop to avoid the dreaded blown highlights syndrome. After you get the image in your computer, work to preserve the highlights while recovering the details in the shadows. As a rule, I routinely slightly underexpose1/3 of a stop or soall my digital images to ensure Im not blowing a highlight. Only when I know the conditions are perfect do I apply the perfect exposure. Save those highlights, underexpose.
7) Use your cameras LCD Youve been shooting film for years and are finally making the transition to digital. You initially think your new digital camera body looks and acts like a film camera. But, you notice right away the tiny video screen on the cameras back. What do you do with that? Some people use it to review their images. Im a highly experience photographer and know how to shoot images you may say. Why should I review my images in the camera using that tiny little screen? The quickest, most obvious reason is exposure control. At first youll find the LCD totally inadequate for viewing images in the tradition sense. Its really useless for assessing those subtle exposure details. Its even not good enough on very bright days to see if youve even gotten the composition right. So, what do I need that little view screen for? You need it for two things--checking out the histogram and scanning for blown highlights. I wont get into the real details of how to use a histogram. I will tell give you a couple quick pointers however. I review histograms to assess the general exposure quality of the image. A histogram bunched to the left means itll be a bit dark. One thats bunched to the right may mean its bright. A histogram that has lots of strength on the far right is a real candidate for blown highlightssee tip #6. Some may even say if the histogram barely reaches to the far, its a candidate for blown highlights. This segues to the next reason I use that tiny view screenchecking for blown highlights. I already noted you cant fix things with your digital darkroom if you dont have any detail. To avoid this, I routinely check the histogram and the image. Youre probably getting confused now. While its true the tiny little view screen isnt useful for assessing subtle exposure characteristics, it can be used to see if the exposure you selected causes large expanses of blown highlights in critical areas. The crazy thing is blown highlights can happen with practically any subject, neutral toned, bright, or otherwise. Ive found the only sure way to avoid surprises after a day of shooting is routinely checking that tiny little view screen. I dont check after every shot but I probably assess things after starting every new shooting situation. Ive found I check the LCD after almost every scenic shot while birds and other wildlife is only assessed per shooting situations. This is especially important if I remotely suspect the exposure conditions were anything beyond normal. These simple assessments are probably the most you can routinely expect out in the field. Making these simple observations using your tiny little view screen will significant reduce digital darkroom frustrations and improve you number of keepers at the end of a day of shooting. As a rule with a static subject, you should never leave a scene with an unworkable digital file if youve been checking that LCD. Its a powerful tool available only to those that shoot digital so use it.
|
|
|


