

All Images And Text On This Site Are Copyright 1999-2001
by
Thomas D. Hill Jr.
| ABOUT KEIKO |
| WHAT'S NEW |
| THE KEIKO GALLERY |
| EQUIPMENT |
| IMAGE OF THE MONTH |
| ARTICLE OF THE MONTH |
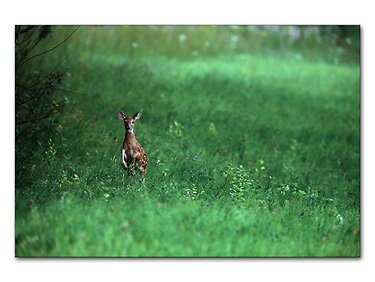
There are a ton of variables when it comes to making photographs. Just the combination of what film you use, what shutterspeed is set, what aperture that's establish, results in a million different looks for the same scene. Each one of these settings affect how the image looks and therefore how it "feels" to the viewer. One of the most critical to understand is Depth of Field (DOF). The short definition of this is it's the range of distance from the camera where elements of the image appear to be in focus. How you set DOF will significantly affect whether your subject has the desired isolation or whether it's related to other in-focus elements in the image.
DOF is a powerful compositional tool. It has the power to really draw the viewers eye to a specific point in the image. Or, it can be used to relate the subject within the context of it's environment. It's all up to you--the photographer--to set whatever you want.
First, the practical physics of DOF. Aperture setting of a given lens is the primary adjuster of DOF. That means when you change the aperture, the DOF increases and decreases depending on what you're setting. As a rule of thumb, the smaller aperture--larger f/stop number--the larger DOF. The larger the aperture--smaller f/stop number-- smaller DOF. Common terms photographers use say when the lens is "wide open" the DOF is small. When the lens is "closed down" the DOF is large. Obviously something else has to give to ensure a proper exposure when changing the aperture. Usually the shutter speed is being adjusted to maintain the proper exposure while you change the aperture. Together, proper shutter speed and aperture make perfect exposures.
Next issue, the range of DOF varies with how far away the center of the DOF resides. The further away you focus, the larger the DOF for the same aperture. What's up with that? Let's delve a bit more in the physics of what's going on. In reality large ranges of DOF don't mean what's properly in focus is actually a big range. If you're completely precise, you can only focus on one spot. DOF just points to the reality the range near the in-focus spot is less in-focus. To a human with his tremendous inherit ability to interpret things with his eyes, those slightly out of focus ranges become indistinguishable from the in-focus spot. This means DOF is really subjective because it's based on human interpretation. In practice, there's very little difference between one person's interpretation and another's for what's in focus. So, the subjective science of DOF has become kind of an objective legend.
As I mentioned before, DOF is just another tool a photographer has in his camera bag. It's just something he can use to emphasize a subject or tell a whole story. It completely depends on what he wants to do. So far I've just touched on a couple parameters--focus distance and aperture--that contribute to how wide DOF is. Another that's just as important to how DOF changes is how a lens' focal length affects DOF. If focal length is the only thing varied but everything else--focus distance and f/stop--stays the same, how does DOF change? The longer the focal length, the shorter the DOF. Conversely, the shorter the focal length, the longer the DOF. This explains why wide-angle lenses appear to have so much of their total image in focus while most telephoto images are just the opposite. DOF is expanded with that wide-angle lens.
Now, there are other things going on here but the basic truths of DOF are as follows: 1) The wider the aperture, the shorter the DOF. 2) The further you focus, the longer the DOF. 3) The longer your focal length, the shorter the DOF.
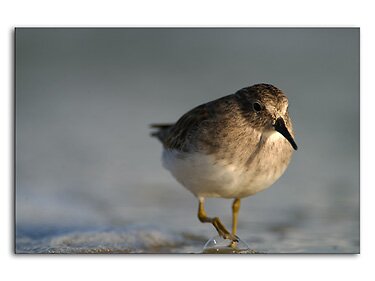
How do I use all this information as a photographer" you may be asking by now? It all comes down to what story you want to portray and what the physical limitations are of the environment you're shooting in. DOF can be used to completely isolate a subject. You do this be eliminating everything else that's not important to your image. The image of the Least Sandpiper is a perfect example of this. Here the background was completly uninteresting and honestly would've distracted from the bird. So, I shot practically wide-open--minimum DOF--and extremely close. The result is a image where everything between the base of the bird's beak and the center of his chest is in focus. Everything else is out of focus. The background is so out of focus there aren't any identifyable shapes. I've created a nice, smooth background for the bird. Overall, it's a pleasing shot that isolates the bird from his world so the viewer won't be distracted.
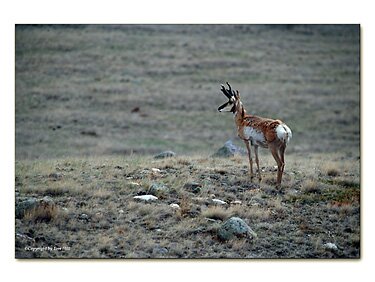
The Pronghorn image is quite a bit different. Though a similar aperture setting was used as the previous image, the DOF is considerably longer. The reason, as we discussed, is the focus distance is considerably further from the camera. As a result, DOF will expand the further you focus from your camera. I specifically adjusted the focus point so all of the Pronghorn's foreground was in-focus. As a rule of thumb, DOF ranges 1/3 of it's distance in front of the focus point and 2/3's behind. By simply focusing slightly forward of the Pronghorn kept the foreground and my subject razor sharp. As I mentioned before, DOF is a subjective distance. If the image was expanded to an extremely large size, you'd begin to see where my precise focus point was and begin to see the Pronghorn was less than perfectly in-focus. But, for my small sized image this is entirely acceptable.
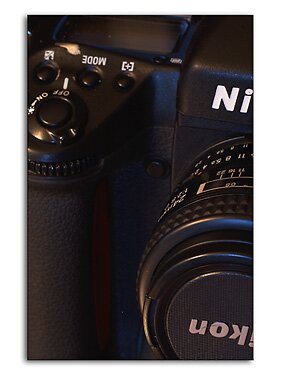
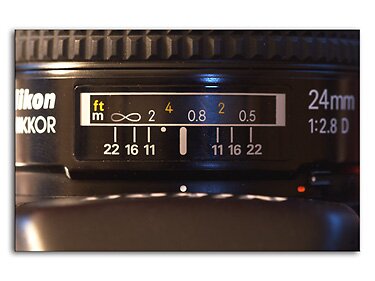
There are a couple of tools you can use as a photographer to assess DOF. The first is a DOF scale that's common on older lenses. This was used to approximate the length of DOF dependent on aperture setting. In the left picture above at f/16, the DOF would range from just above 0.5m to short of infinity. While I've found this kind of information invaluable there are two things to consider. First, very few zoom lenses have this DOF scale on their lenses. Second, the range is an approximation. In most cases acceptable DOF is smaller than what's printed on the DOF scale.
The better tool used to assist the photographer with DOF is the DOF Pre-view button. Available on almost all "pro" series cameras, it's sorely missed on some top-of-the-line "pro-sumer" cameras. This is unfortunate and I believe makes the camera almost useless for photography that takes extraordinary advantage of DOF like Landscape Photography. The DOF button is located on the right of my Nikon F5, just next to the lens barrel. All you have to do to verify DOF is activate the button and allow your eyes to adjust to the dark view finder. All a DOF button does is reduce the aperture to what's set to simulate the adjusted conditions. Unfortunately, since the view finder is so dark, the smallest apertures with the widest DOF's are very difficult to use for assessing proper focus.
DOF is a wonderful tool and is easily used when it's properly understood. I've included a few examples of how to use DOF but a whole world awaits your contribution.
Cheers
Tom
1 Nov 01